Recently I have been thinking about the subject of pneumatic launchers again. That led me to go rummage through the pneumatic parts bins at the surplus dealer again...
And I bagged this for a couple bucks.
This is a Humphrey Products QE-3 quick exhaust valve. If you have never heard of QEVs, they are industrial hardware, used mainly in pneumatic automation, but they are functionally equivalent to piloted firing valves used in some types of airguns and quite useful for this purpose. You may know variants of this family as piston valves, diaphragm valves, modded sprinkler valves, or "backpressure valves" (a NICism).
QEVs are a useful bit of kit, being compact, ready-made and higher-spec than most hobbyist DIY valves and stuff gutted from nerf airguns, which is just the direction I was thinking of going in experimentation. Strange that I randomly find one now.
There is just one problem.
That doesn't look right...
Yeah, that's not right. I bought a gutless valve. Apparently, someone used this valve body as a pipe elbow at some point in the past, then surplused it.
Well, the castings are good and it's not Chinese junk. About 8 bucks to rebuild with new parts and then it will be solid. Gonna do that later.
HvZ and nerf news, tech, mods, reviews, tests, builds, opinions and observations from the firing line.
Thursday, May 22, 2014
Saturday, May 17, 2014
Why compensating for resistance using additional voltage is bad design
This is an expansion on, and a preemption of an anticipated response to, this post, in which a certain modification style involving stock or thin replacement wiring and TrustFires or equivalents in battery trays was analyzed and found to be grossly inadequate relative to the use of battery packs and thick wire.
"But wait," one might say, "why can't I compensate for the underwhelming performance of my favorite ***Fire brand by using more of them? Won't massive overvoltage overwhelm that pesky resistance?"
Yes, but this creates other problems. Simply put, any system which compensates for excessive resistance using excessive voltage will deliver excessive power to your motors when they need it the least, and/or underperform when they need it the most.
The nature of the problem is straightforward. Spinning motors act as generators which produce an electromotive force which opposes the current which drives them (a.k.a. back EMF), which is a linear function of the motor's speed. A still motor generates no back EMF, and a free running motor generates back EMF which almost cancels the applied voltage ("almost" because a small amount of current is needed to overcome friction). This causes the current drawn by the motor to vary with speed - which is good. During transient conditions (winding up, flinging a dart, and recovery - or winding up and compressing a spring), the motor moves at less than it's maximum speed, and high current is desired for torque. While free-running, less current is desired, to minimize motor wear. At constant voltage, motors naturally draw the current that we want them to. Convenient, right?
This only works if the back EMF is large compared to the resistance. If the resistance is large, the resistance dominates the current regulation, and the current will consequently vary much less. This presents the Morton's fork of choosing a high voltage (and thus current) which will damage the motors (and/or cause other problems) or a low voltage (and thus current) which will harm performance under transient conditions.
Due to the contribution made to muzzle velocity by flywheel inertia, the reduction in performance of high-resistance high-voltage setups is the most severe when the ROF is high. So, someone who throws TrustFires in a Stryfe may have deceptively adequate muzzle velocity so long as their ROF is low when they test their system, but this will falter when they fire several darts in quick succession, as one often does during a game to secure a stun.
If you want a more rigorous argument which details the magnitude of the problem, read on.
"But wait," one might say, "why can't I compensate for the underwhelming performance of my favorite ***Fire brand by using more of them? Won't massive overvoltage overwhelm that pesky resistance?"
Yes, but this creates other problems. Simply put, any system which compensates for excessive resistance using excessive voltage will deliver excessive power to your motors when they need it the least, and/or underperform when they need it the most.
The nature of the problem is straightforward. Spinning motors act as generators which produce an electromotive force which opposes the current which drives them (a.k.a. back EMF), which is a linear function of the motor's speed. A still motor generates no back EMF, and a free running motor generates back EMF which almost cancels the applied voltage ("almost" because a small amount of current is needed to overcome friction). This causes the current drawn by the motor to vary with speed - which is good. During transient conditions (winding up, flinging a dart, and recovery - or winding up and compressing a spring), the motor moves at less than it's maximum speed, and high current is desired for torque. While free-running, less current is desired, to minimize motor wear. At constant voltage, motors naturally draw the current that we want them to. Convenient, right?
This only works if the back EMF is large compared to the resistance. If the resistance is large, the resistance dominates the current regulation, and the current will consequently vary much less. This presents the Morton's fork of choosing a high voltage (and thus current) which will damage the motors (and/or cause other problems) or a low voltage (and thus current) which will harm performance under transient conditions.
Due to the contribution made to muzzle velocity by flywheel inertia, the reduction in performance of high-resistance high-voltage setups is the most severe when the ROF is high. So, someone who throws TrustFires in a Stryfe may have deceptively adequate muzzle velocity so long as their ROF is low when they test their system, but this will falter when they fire several darts in quick succession, as one often does during a game to secure a stun.
If you want a more rigorous argument which details the magnitude of the problem, read on.
Wednesday, May 14, 2014
XEliminator Reactions
It's an off-time for me, in terms of both modding and playing, so I am on a rant streak! Don't worry, I will be back to my normal self soon enough...
Anyway. Many of you have seen images of or heard of this gun:
This is an Xplorer XEliminator, which has picked up the NIC shorthand "Xe".
A very limited production piece, with only 10 confirmed to exist, and a price tag of over $1000, US. Yeah. THAT thing.
Anyway. Many of you have seen images of or heard of this gun:
![]() |
| Image Credit: Nerf Modders Welcome/Facebook |
This is an Xplorer XEliminator, which has picked up the NIC shorthand "Xe".
A very limited production piece, with only 10 confirmed to exist, and a price tag of over $1000, US. Yeah. THAT thing.
Saturday, May 10, 2014
RANT: The Battery Wars Rage On
Ah yes. A classic hot-button issue, and a very divisive one. I have felt like doing a post about it for a while, but I did some recent stalking around on the interwebs, and let's just say that shots are still being fired, and the war is definitely still alive, so now is as good a time as any, I guess. In this post I really hope to clear some things up about the battery firestorm.
So first, a little history for the uninitiated. The "battery wars" primarily concern the power systems for electric Nerf guns and the efforts to improve on longstanding status quo practices, which for reasons unknown (but maybe all too familiar) have been met with tremendous resistance.
Wednesday, April 16, 2014
RS Tactical completion
Or at least complete for now, until I get some cells to make a 3S battery for this gun; and/or give the Xtremes a shot with it.
In the meantime, though, I got some images of some stuff that might not be that well documented in the NIC.
This is the pusher box with a FK180 motor installed. Note the shell modification is not very complex; the formerly enclosed endbell area (to fit a 130 motor) is removed.
180 install with the shell open showing the worm installed.
The stock "socket" part of the mount does not need to be modded, only the end that would interfere with the 180 can length.
Once the screws are installed, this is a tight fit. Movement of the motor is not likely, although something to retain it positively is desirable. I usually make that part of the external motor cover.
This is the receiver hole location for a 180 pusher swap.
A cover like that for the flywheel motors will be provided.
Unfortunately, I painted before realizing that this receiver mod had been left out. D'oh.
Flywheel cage.
Of note here are the problems many people have had with installation of 180 motors.
The mount sockets are designed for the finished can diameter of a 130 motor. While theoretically of the same cross-section (but different lengths and endbell designs), the FK180 (or perhaps just FK in general) can is slightly larger than the FA/FC130 can and thus the fit is objectionably tight, to the point you might break something trying to install motors, or at the very least create a problem with mount deformation and accuracy.
These mounts have ribs inside used to achieve the relevant dimension, so those need to be shaved a bit. Use of a grinder is not advised. A knife is more suited. Also, if you have a tight press fit in the final setup (which you should if you don't plan on running brackets, screws or hold-down straps on the motors like stock) you should lube the front end of the motor can very lightly before shoving it in.
Also note the orientation of the red endbell plug (polarity marking) is toward opposite ends of the cage. This gets the correct rotation direction with leads going straight across the cage. In this case the rear terminals (green wire) are positive for forward rotation.
Yes, you do need to fully seat the motor can into the mount or you will have trouble. A few cases of flywheels coming off the shaft have been described and the likely causes include insufficient shaft engagement because the motor was not seated before installing the flywheel in its final position.
Note the position of the bearing snout, flush with the mount surface.
This is the usual teflon insulated 16 AWG, MIL-W-22759.
Good practice is to keep the wire away from any kind of severe contact with the motor can. The rear edge of a FK can is sharp and can cut insulation. If you use PVC insulated wire you also don't want wire to touch anything that could get hot in some condition, including motor cans.
Installed.
Be careful with the magwell wire cover in the RS. It is easy to pinch the wire and damage insulation.
Speaking of terminals, the terminals on FK motors are very fragile and stick out exactly where they are most likely to get whacked. Be very careful of them when installing motors, cover your terminals up as soon as possible after installation, and avoid having to learn the broken terminal lesson for yourself.
Now... this was unplanned.
I got it wired up normally, modded the FCG as in the Standard Rapidstrike guide, and... the pusher took right off at full fuel as soon as I pulled the trigger. No active braking.
Is the wiring correct? Yes. Bad solder joints? Nope. Internally broken wire? Not that either. Bad switch?
Uh, Houston...
It was the cycle control switch, which was physically off-spec somehow (or perhaps it was the follower for the pusher rod being off-spec, in either case this whole gun as it came from the factory was very disappointing, a giant mess of off-spec parts and shoddy workmanship that wouldn't have worked out of the box, thumbs down Hasbro). If I pushed on the switch toward the follower it would brake normally.
Tried to remove the switch and PCB from the clips molded into the FCG shell and...
As these ultra-cheap crappy switches love to do, it fell apart and spilled its guts.
You can see how these things work - they are a sort of knife-switch type contact, 3 stamped copper alloy blades with integral terminals mounted into a piece of FR-4, with little copper clips with some kind of coated contact surface that slide along the blades, a nylon carrier with the button integrated, a spring and a steel housing and that's all there is to it. These ones are the DPDT version which in the Standard RS (and stock Stampede, Swarmfire, Vulcan) are paralleled to SPDT for better current handling.
(As a sidenote it is amazing the kind of durability and service these give under our abuse...)
Well I didn't bother reassembling it, troubleshooting it or cleaning it. I was having quality rage by now, I was sick of these cheeseball switches, and I ripped it out. And its twin on the trigger, too. I have long known about UK builders having their 3D printed FCG shell half and a favored model of Omron mini microswitch, but I guess it took a failure to finally make me do something.
New cycle control is a mini microswitch, roller lever actuator.
Note that the configuration shown is flawed as the actuator will be caught and smashed by the pusher rod on the return stroke. Thankfully I caught the problem before anything got trashed and modified the actuator. You will see the necessary bend later on.
This is the switch I used, which is locally available. This was not planned for. There are superior switches to this part at a superior price in the same form factor, such as those Omron units the UK community uses.
This is the completed FCG minus the left shell half. You can see the CC switch modified actuator to work with the stock pusher rod. Also the trigger has been fitted with the same switch. The rev switch (green) is a full-size for comparison.
Of course, the timing can be adjusted at build time as it was here, and if I was going to take the time on one of these conversions, it would be adjustable later by loosening 2 screws, but this one works for now with the switches glued down. I will save the optimization for when I have the proper switches.
And with that out of the way and the pusher eager to spam some darts (but only some darts, down to and including one), it's finished.
After putting the battery in this stock (which is the one you have seen before), it is ready to close.
There is, by the way, a single 1N5551 diode feeding the pusher power lead to clean up some nagging stability problems with the FK pusher/2S combo. Obviously, when a 3S battery is fitted, more diodes will be inserted there.
Only needs that pusher motor cover.
100-110fps 650RPM.
Tuesday, April 15, 2014
Shelf Watch 04-14-14
I have been on the usual routine of trolling around local stores looking for trouble in the sporting goods section, but the reason for lack of Shelf Watch posts has been lack of activity.
This time, I was really looking for something to post, so I checked out a Kmart in Gainesville Florida that I rarely visit and found some odd items in stock.
They rotate on the trigger pull with the distinctive half-step action of a Maverick rotation system. Pass!
Lanard Huntsman 50. If I had cash to burn I would have bagged one. I want to test and mod it as there is a shortage of said info.
I admire this gun as a product. It's still pretty toyish in the design quality and safety is obviously done justice as it should be with bright colors in due places, but there is something about this gun's overall no-BS, no-PC approach and vibe that I really think is missing from the nerf industry and even the NIC. Slightly milsim paintjob, firearms references, and a line called Huntsman... Cool. Also note that Lanard called a magazine a magazine, too, and "bolt action" is actually bolt action and not Buzzbee's idea of awkwardly pumping a multi-stroke pneumatic with the bolt.
Awesome. Faith in the industry slightly increased.
Kmart exclusive (at least in the US) Proton 2 pack. Old scheme. May be NOS.
Buzzbee Overlord which has been notably absent elsewhere recently. Whether this gun is in production is questionable. This store had obvious NOS product stacked up and doesn't seem to move product very fast at all.
Curveball: Pre-Elite era Jolts. NOS. This is strangely enough the store where I first found Jolts locally in 2011.
Odd observation: The shelf/hanger tags for the Elite mag pack had something about the old Flip Clip kit in the description. Kmart reuses tags, shelf space and probably item numbers, perhaps.
Back to the Huntsman 50, closeup of non-use of "blaster". They call a gun a gun! Not too common in this age of endless political correctness. A big thumbs up from me, Lanard!
A full complement of Rebelle stuff. That HBB is not the original scheme. I don't follow Rebelle so I don't know anything about the history of HBB paint schemes.
Also note the NOS Barricade.
Tek Recon in the wild. This is one of TWO sightings of TR by me... ever. One in a Walmart in Orlando. One here. Havok...
And Hammerhead.
Changing gears to recent Walmart observations...
Nerf phone mounts on clearance for $5. I am still unclear on the images of an updated (more compatible?) replacement for this design. Have only seen the above product in stores to date.
Random: Zooma DartX Clip-Load Dart Blaster. A clip-fed (clip being correct usage) example of a "classic dart gun" using those old-style rubber darts with a thin body and a suction cup on the tip, sort of like an oversized foam-less Streamline tip. Most likely a direct spring launcher. These preceded nerf, foam-body darts, and spring-piston airguns used to launch darts, but fell out of favor, I guess. Probably due to subpar performance potential.
App Blaster on clearance. Haven't heard much about it, and it's not a nerf gun, but figured I would post the sighting. I only saw one.
BTW, speaking of clearance, I haven't seen JT Splatmaster products in a Walmart or any other store for quite some time. I found my Z90 in the clearance section of a Walmart and my Z100 online. It seems the original big bad box store is rather aggressive about what nerfy-things they stock and which ones they pull and dump the remains in clearance.
And shifting again, now we are in the familiar Butler Plaza Target in Gainesville, where many a dart destined for a UF zombie was sold.
Interesting water balloon slingshot/catapult. Looks rather... big.
This is similar to a homebrew special zombie weapon in the last Gators HvZ game which was used to fire lethal socks at humans. It caused my death in the final mission. If it can launch water balloons, it can launch socks... just an idea to save development time/cost if anyone needs such a device for some gaming purpose.
Decent quantity of Zing stuff. Z-Curve Bows are everywhere! I was apparently incorrect in a much earlier Shelf Watch when I wondered if the Z-Curve was getting replaced due to safety or some other reason. The Z-Tek Bow I had caught in that Shelf Watch is now nowhere to be found, and in its place is the Z-Curve. Guess I had them backwards.
You can't see the price tag on that cardpack of Zing arrows but it reads $9.99 or something similar. Ouch! Ammo cost is a major problem with this system. For that amount of cash (with no online purchase, careful shopping, coupons, promotions or sales of any kind) I could have 30 rounds of the best .50 dart you can buy (Nerf ZombieStrike Elite). Who doesn't want to shoot 10+ times as much stuff for the money?
Also, strangely enough, Target stocks the Zing bow products with the soakers one aisle over from the rest of the non-seasonal nerfy stuff. Unless I'm missing something, they don't have anything to do with water or soakers.
Oh yeah, this is a thing. Saw one being played in the last UF HvZ game. Not all stores have them, and those that move product slower tend to have significant stock of blue scheme Stryfes, but they're out there and with an open pack rather than a box.
Monday, April 14, 2014
RS Tactical build progress
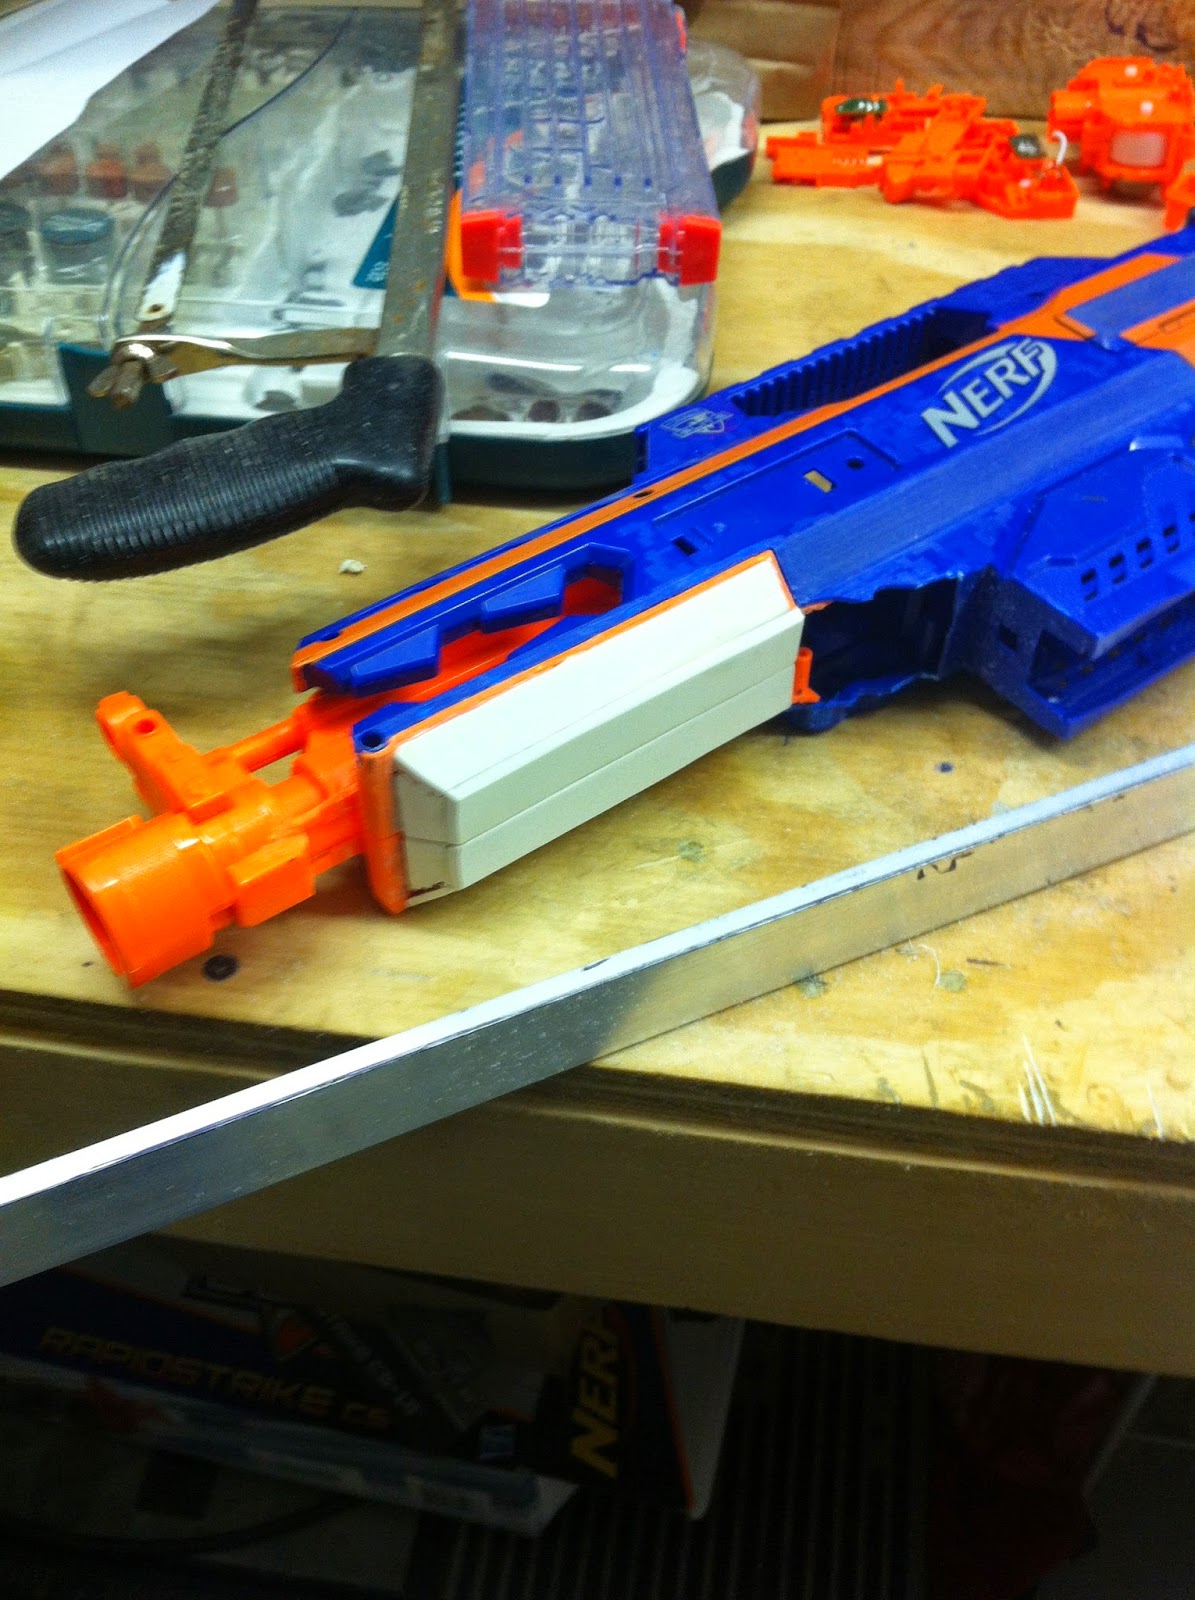
By the way, this gun is a later production unit with a 32961 stamp and I must unfortunately say the QC hasn't improved. Tons of sketchy soldering, paint overspray, scratches and blemishes, and even some rather janky looking flywheels with quite a bit of runout. No wonder people are having pushers dead out of the box and unexplained electrical gremlins after a gun was dropped. Fix your shit, Hasbro.
Barrel shroud shimmed out with PVC
Starting bodywork.
90% result.
There was a slight change of design on the barrel shroud bodywork, namely, the chamfered front end. I am not entirely happy with that but I don't think I will ever be.
In place of the blended foregrip, I decided to have a finger-grooved magwell like I saw in an image of a souped up AR15 variant of some kind. In order to do that I installed some thick PVC blocks here, which would both be carved freehand into the grip area, and have some countersunk fasteners and tapped holes for structural reasons.
And here is the first stage of the grinding completed. Much PVC dust flew that day. Also note I fenced the magwell and filled in what were now gaps left by those stupid chamfers on the sides of the stock magwell...
(On that note, Hasbro designers, what in the blue blazes were you thinking having a magwell with this abnormally thin edge and placing these two superfluous chamfered areas right in the path of the feed lips of the mag you are inserting? The sharp edge of the magwell created by the chamfer tends to catch the mag if you don't get it exactly in the right place and make you fumble your mag change.)
And the final profile, prior to sanding. You can also see some of that cage area bodywork.
That's a massive Devcon bond line on the left. I done goofed somewhere... but in the end it's no big deal.
I was rushing the hell out of this build. I dunno why, but at the moment I am not on the ball with regards to fabrication. I have done cleaner work before. I would rather be soldering and running wire I suppose.
And some of the overall results.
And since this is destined to run 180 motors of some description, an endbell cover is called for. I traced the stock flywheel cage bulge on the receiver and cut it out of PVC sheet.
I then got to work on a PVC flash hider for the muzzle of this thing. After the Oblivion build I had started finding Nerf's muzzle devices rather bland and superior ones easy and quick to make. It's an aesthetic feature, and this is not a prop, but I think you will understand what I mean when you see the end result.
Birdcage style for maximum durability and to avoid getting snagged in vegetation and gear, for HvZ and stock class game utility.
Another view of the completed fabrication on the receiver showing the endbell cover mounted on standoffs. Some prefer to seal up this area tightly, but being that I am going to be running those motors hard on 3S at some point (and some of these motors are not cool runners), I want ventilation.
Got the FH sanded, sprayed with primer, and Devconned to the cut down insert out of the FSB that used to have the twist-lock on the front.
Doesn't that look mean? If this was a milsim build...(Un)Fortunately safety prevailed. This gun is a basher, not a wall hanger. All the local games are public.
Now this was strange. The factory orange paint on the receiver caused my Rustoleum rattle can automotive primer to alligator like all hell. First time I have had this problem... but not the first time in the NIC that factory paint has been incompatible with what someone sprayed. Note that the flat surface of the faux dust cover was sanded to remove the molded lettering, which also stripped this paint.
This also wasn't just a surface prep/contamination issue. Sanded or unsanded, washed or not, wherever this paint was, everything I sprayed alligatored.
I had to scrape and sand all this crap off and respray the parts. Grr. Just a heads up, you may want to spray a test swatch of this stuff with your primer and determine if you need to strip it or not BEFORE you go to the trouble of spraying primer "for real" on the whole part and risking a respray when this happens.
Finally, this was the primer. Grip and cheek rest have stock paint and are masked off.
Rail masked. Once again, this is a bit weird that I have this primer used as a finish in cases like this, but it's a unique and good looking result.
Base color sprayed. this is Ace brand Rustoleum knockoff enamel... just like the real deal, slow cure, great coverage and durable as hell, no clear required. A great type of paint for serious players, and guns that work for a living and need to look decent after abuse, rather than being showpieces.
This paint is a bit thick, and I have heard some complaints to that effect, but I like the high build of my auto primer and Rustoleum enamels, it forgives some sins with bodywork that should have had Bondo and more endless sanding. I did have a few drips and uneven coverage on this but that's not the paint's fault, just me rushing the fsck out of this build again.
Finally, the white stripe was masked and sprayed.
Mostly finished PJ.
Still with Hasbullshit, cough, I mean Hasbro rails for now, including the one I just installed on that handguard here. Picatinny conversion of my arsenal delayed due to cash.
Now to drop some motors into this thing and wire it up. Cash is too tight to put a set of Xtremes in here now when I already have a full set of three Mabuchi FK's that I got for half the price. They WILL get their test and review, and probably will be in this gun, but slightly later.
I am also planning to use the existing 2S stick pack I have for now, until I can get some cells and build me a 3S. Oh well, it won't be as crazy, but it will be 98% as practically effective.
One thing I did forget to do, somehow, was the endbell cover for the pusher motor! That will be white PVC and added carefully without disturbing the paintjob.
Subscribe to:
Posts (Atom)