Tools:
- Allen wrenches
- Multimeter/Voltmeter
Parts/Materials:
- T19 breech/cage/barrel assembly
- T19 drive section assembly
- T19 stock assembly
- T19 grip assembly
- T19 Core board
- T19 logic power module
- T19 DC bus harness
- Flywheel motor controller x 2
- Mag release spring: Use any small spring that fits into the drive housing spring perch and has a solid height that allows the mag release to release mags - approx. 4mm diameter x 12mm free length, relatively light, to suit desired release tension
- White lithium grease
- 14.8V battery - recommended for T19: Turnigy Graphene 4S 1500mAh 45/90C
- Full length .50 cal superstock standard magazine for testing
- Darts, .50 Hassenfeld/"Full Length", soft tip (NO FVJ or Voberry or etc.)
- AIM Sports 12" x 0.40" aluminum Picatinny rail segment
- 10-24 x 1/2" and 5/8" length SHCS for rail installation

DRV8825 prep:
Adhere the supplied heatsink, if you received one, to the underside of the DRV8825 board where the gold-colored thermal pad is using its double-sided thermal adhesive tape. Make sure it is centered so that it doesn't hit the socket headers when plugged in.

N.B.: It is common to see these heatsinks attached to the top of the DRV8825 IC package. The DRV8825 is not designed for that to be a thermal path and the package plastic is obviously plastic and high thermal resistance and doesn't really help much to stick that heatsink on there. The thermal path is intended to be the thermal pad on the underside of the IC package (TI "PowerPAD"). The main heatsink is the copper on the PCB, including the bottom thermal pad connected to the topside by all the vias. You can put the heatsink on top if you like, or even not use one of these add-on heatsinks (the main heatsink is the board itself anyway, and if adjusted correctly the driver should not run hot in this app) if you didn't get one with your DRV8825 board.
(N.B. 2: Some installations, such as 3D printers, my own Model Pandora T19 prototype, and the FDL-2 early AC version bolt drive boards, specifically avoid putting the heatsink under the board on the thermal pad and instead put it on top of the IC package because they put the DC link capacitor under the board. Do not do this. There is a reason I don't do this nowadays. This is stupid design - electrolytic capacitors should NOT be thermally near a heat-releasing component, which the driver is, and also, the axial lead capacitors commonly placed under these driver boards are all junk in terms of ESR. An inverter DC bus cap should be as low ESR as possible. Use a radial lead low-Z capacitor and put it away from heat sources.)
Core board installation:
Mount with 4 self-tapping washer head screws (anything that will bite into the board mounting holes and is about 6mm long). I use random screws from scrapped toygrade bits of many years ago

Drive stack assembly:
Drop the spacer on. Plug the bolt limit switch into the Core board. No polarity to this connector.

Lubricate the drivetrain with white lithium grease, particularly: bolt yoke side thrust faces, bolt rail surfaces upper (drive cover) and lower (drive spacer), crank pin and bolt yoke slot, and the bolt tip notch in the spacer and bolt tip (wipe off excess grease here to prevent ammo contamination and possibly poisoning the friction surface on the flywheels).

Failure to lube the drivetrain can result in part galling.
Don't use hugely excessive grease quantity or leave blobs that aren't on contact surfaces, to avoid mess.
Start the 6 upper drive stack bolts and torque evenly.

Drive section to front end mate:
Stand up the drive section on its rear end. Insert the mag release spring into the drive housing spring perch.

Drop the breech/cage assembly over the bolt tip and align it to the drivetrain stack. Test mag release motion and spring non-binding.

Start 2 3/4" length 6-32 SHCS (top) and 2 1/2" length 6-32 SHCS (bottom). Torque evenly.

Test mag release function with a mag.

DC bus harness installation and stock installation:
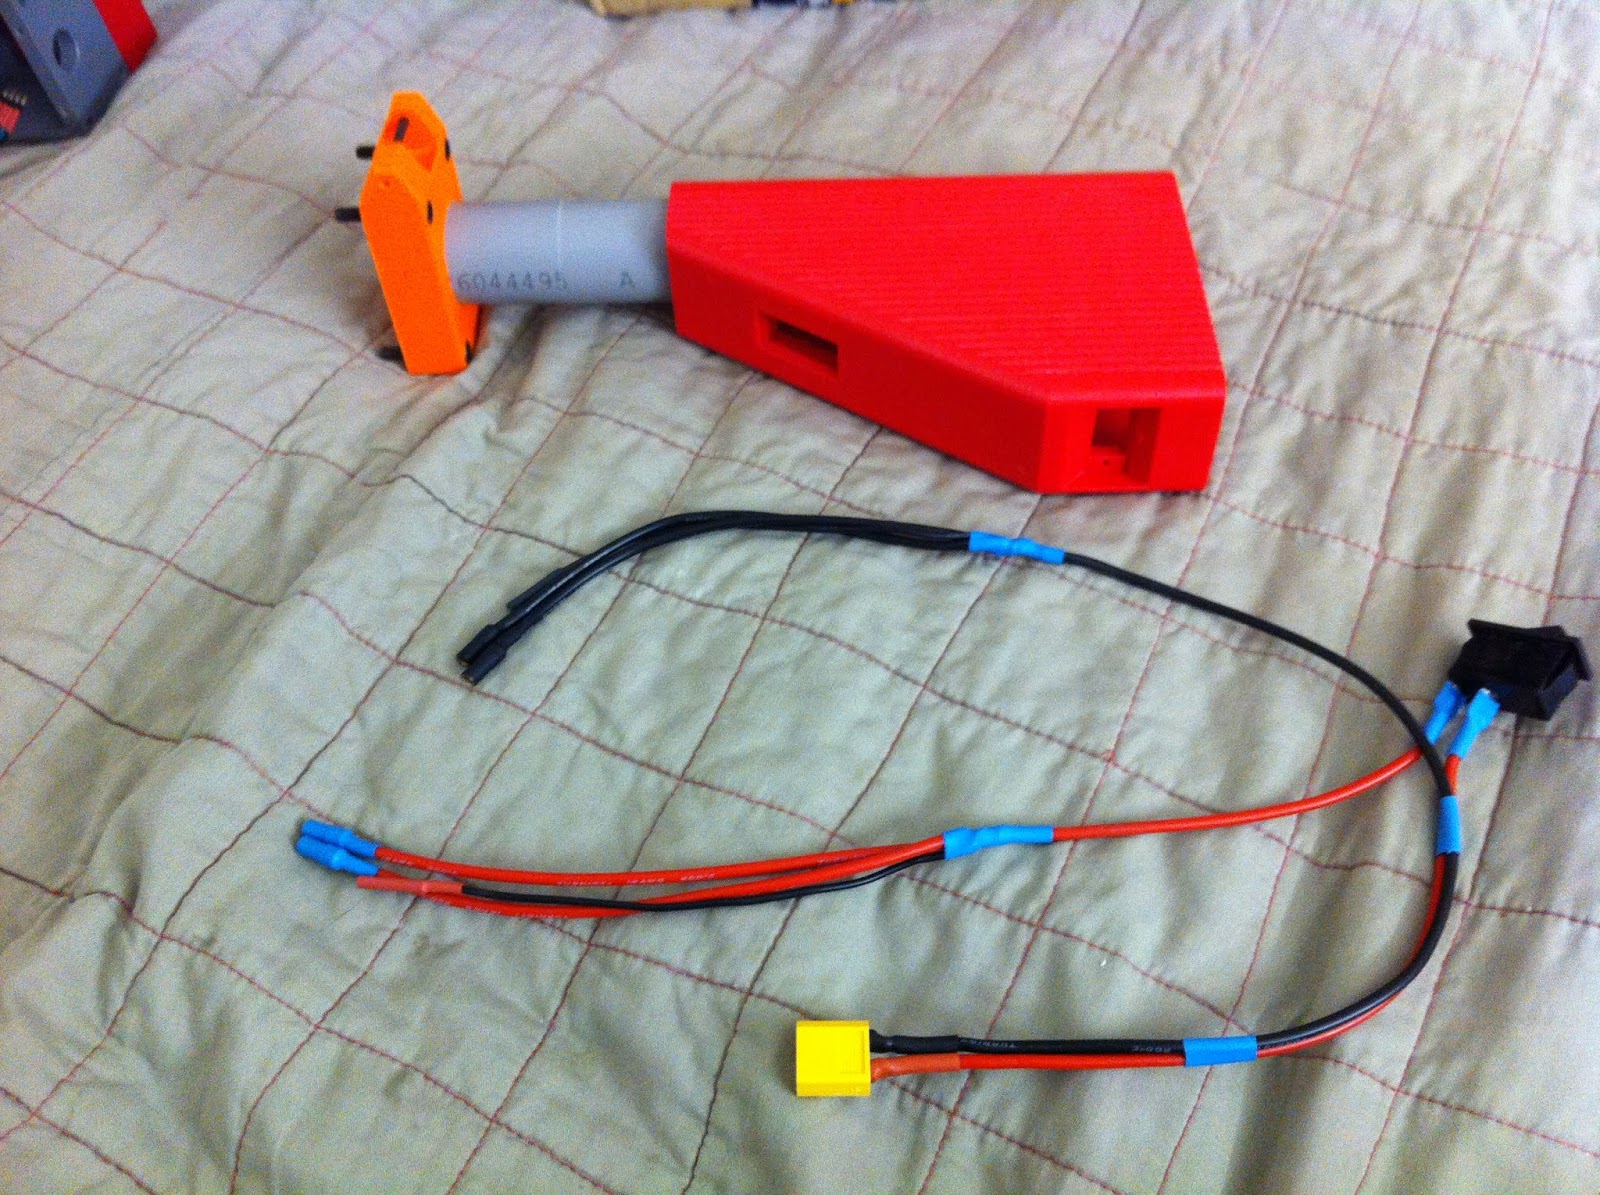
Insert the ground squid through the switch cutout in the stock. Jockey it down the stock tube and out the stock base hole.


Insert the battery connector through the switch cutout and feed it toward the rear of the stock.


Insert the positive squid and jockey it through the stock tube along with the ground one.
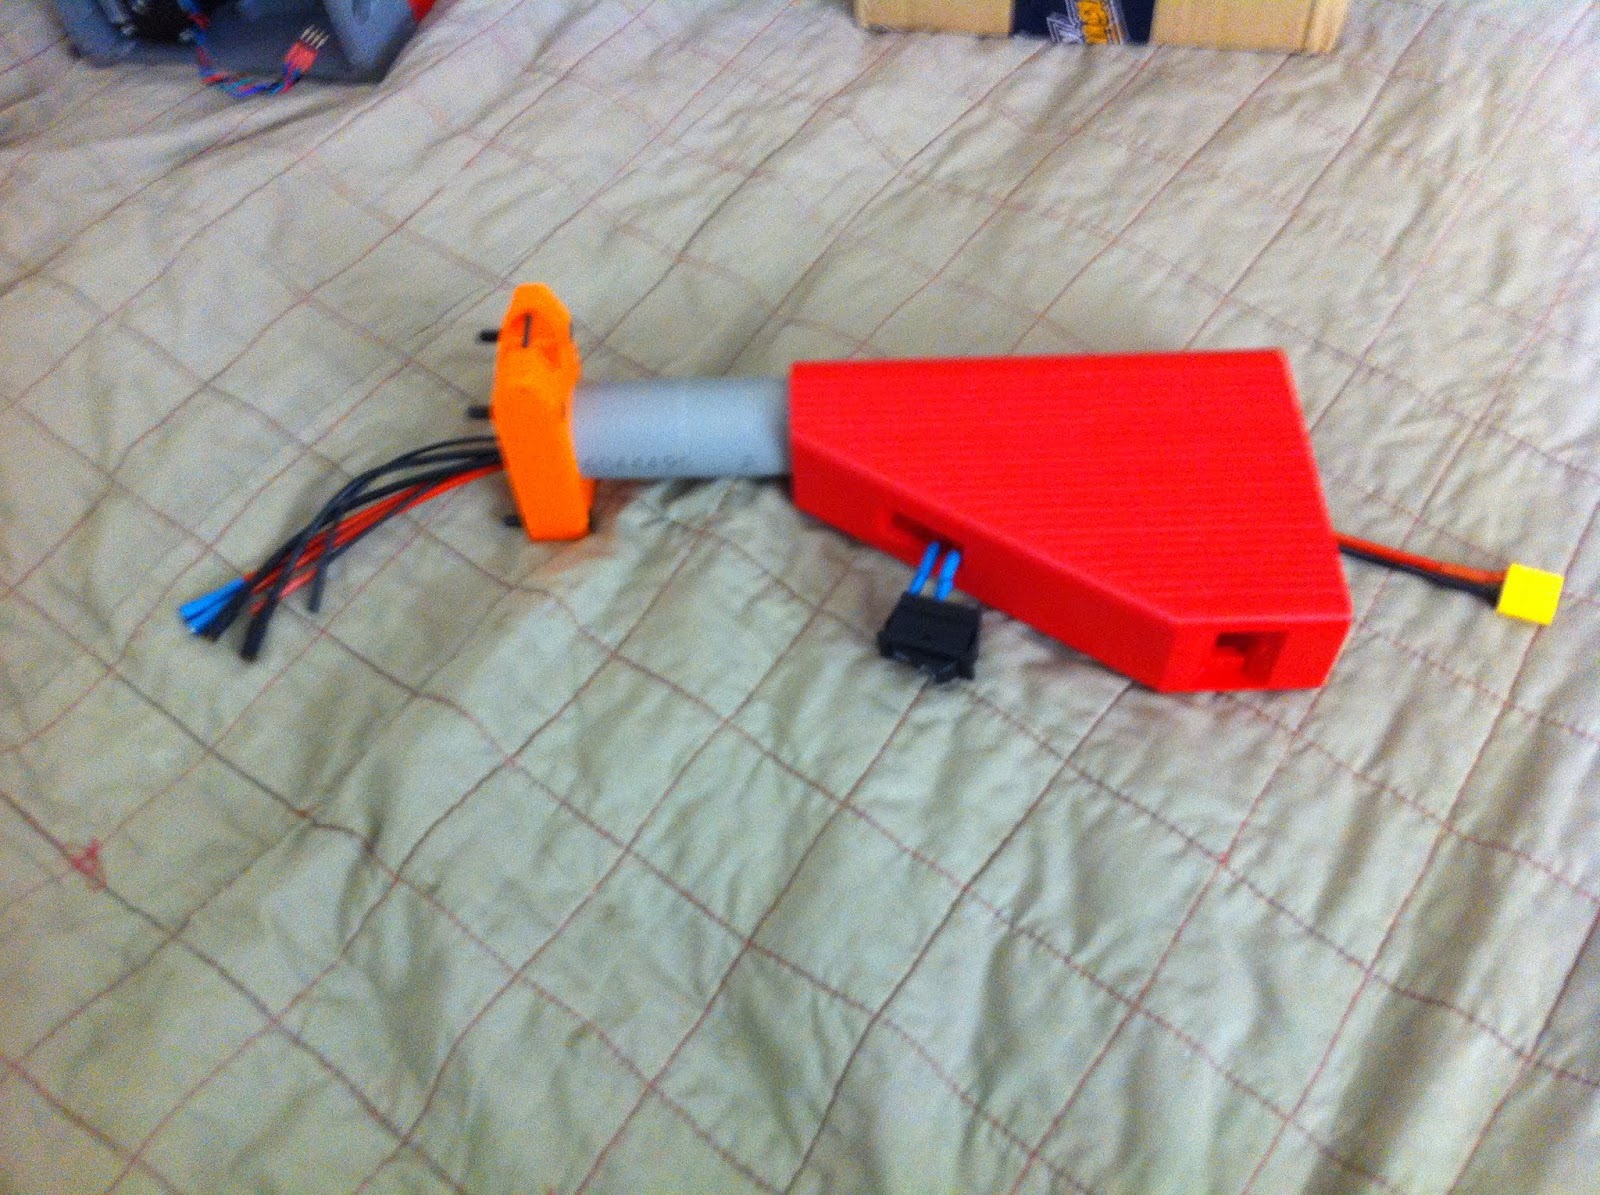
Insert the switch (I/On position toward the front of the blaster) fully into the switch cutout. It should seat flush and clip in place.


Feed the ends of the squids through the wire hole in the rear drive housing bulkhead and bolt the stock on; torque evenly.


(ignore the side covers on for now)
Motor controller installation:

Plug a motor controller into each motor's phase wires.
If you have a motor test setup/servo tester/throttle generator, this is the time to give each a test rev to verify correct phase rotation. If the flywheel spins the wrong direction, exchange the connections of any two phase wires. Otherwise you will need to verify this after plugging in the blaster controller.
Feed the DC bus leads and the throttle cable of each controller through the wiring holes in the breech and drive housing.

Carefully, without pinching any wires, tuck the controller and phase wire connections into the controller compartment and install the controller cover.

Repeat for the other side.
Rail installation:

Bolt the rail on with the two 10-24 SHCSes.

Be mindful of screw length in the front mounting hole. If the screw tightens up prematurely while threading in, stop and verify length and hole depth.
Final wiring connections:
Plug the flywheel motor controller DC bus leads into the squid harnesses.

Plug the flywheel throttle cables into the throttle connectors - be sure to connect the signal pin of the controller to the signal pin of the Core board and the ground to the ground. As I built this backplane, the signal pin is on top when looking into the DH with the muzzle facing left.
Plug the logic power module into the last 2 (20AWG, 2mm bullet) wires from the squid harness, observing polarity;

...and plug the output connector into the Core board. (WARNING: Don't plug in the logic power connector backwards. Refer to how you wired this in Part 7.) Tuck the module into the drive housing.

Grab the grip assembly and plug its cable into the trigger connector on the Core board. It's 50/50 whether you will get the polarity correct - if not, the blaster will not fully boot and complete its selftest routine.

First Light:
VERIFY ALL WIRING CONNECTIONS! This is the one last chance you have to correct any brain fart that could lead to magic smoke!
Plug in a sufficiently current-capable 14.8V battery, such as the recommended 4S 1500mAh 45/90 Turnigy Graphene.
Disconnect the bolt motor from the board (if you got ahead and plugged it in earlier), since we have not adjusted the current control on its driver yet.
Flip the switch. The processor card LED should light up. You should get a SimonK power-on selftest beep train, an arming beep, and then a throttle blip from both motors. Both flywheels should be turning forward.
Troubleshooting at this stage:
- If you don't get the throttle blip indicating that the Core controller completed selftest and is ready to fire, your trigger connector is backwards, resulting in a constant trigger-down input when the trigger is up. The blaster won't boot if this happens, it will hang indefinitely waiting for trigger release. Shut the power off and reverse it.
- If a flywheel is turning the wrong way, its phase rotation is incorrect, swap any two phase wires.
The DRV8825 uses a reference voltage input to set the current regulator setpoints. This voltage is derived from the 5V rail by a trimpot on the carrier board.
Disconnect the stepper motor from the Core board, if you plugged it in earlier. Power up the blaster. Measure the voltage between a ground pin on the DRV8825 carrier card and pins 12 and/or 13 of the DRV8825 IC package (which should be electrically connected; or use the exposed via near this area ONLY if using a Pololu brand board with a Pololu logo on it and NOT a Chinese generic board).
 |
| Source: RepRap Wiki |
 |
| FOR GENERIC (non-Pololu) 8825 BOARDS: Do NOT measure that exposed via! Measure the IC pins 12 and 13 by seating the probe between both, which are connected. This confusing via looks like the one provided for a meter probe tip on the Pololu board, but is NOT connected to Vref on this version of the PCB. |
DANGER: There is a ground pin immediately next to a DC bus pin (the last one on the end) on the DRV8825 carrier. DO NOT SHORT THESE TO EACH OTHER WITH THE PROBE TIP while measuring or else there will be fireworks!
For this application and motor, set Vref to about 1.0V (about 2.0A phase current).
See also https://reprap.org/wiki/A4988_vs_DRV8825_Chinese_Stepper_Driver_Boards#Trimpot_adjustment
Plug the bolt motor back in. (Rotation direction doesn't matter.)
First Cycles:
Power up again, now with the bolt drive ready to run. You should now get a growl from the bolt motor before the flywheel blip when booting up. If the bolt was not at home position when assembled, it should find home automatically on startup.
Ready for the moment of truth? Pull the trigger!
- Both flywheel drives should spin up smoothly and simultaneously and snap hard up to governed speed.
- The bolt should cycle and return home.
If you didn't use a throttle generator to manually "exercise" the flywheel drives and verify proper startups earlier, do this now by firing. Do lots of 0 rpm cold shots. Also, wait until the motors spin down to very low speed and then fire while still turning - this is a common case for a defective controller to exhibit symptoms. NO misfires, delayed starts, or anything except smooth, simultaneous spinups should happen no matter what situations you try to fire under.
Power down, then hold the trigger down and power back up. Once SimonK says hello, release the trigger. You should get two bolt motor growls before the flywheel selftest rev, indicating turbo mode (actually alternate preset mode, configured as a turbo mode in stock Core) is active. Dryfire now - you should have 13.8rps ROF with stock Core, and the bolt drive should run smoothly at this speed.
Stick a loaded mag in and fire your first darts.
Once satisfied that the mechatronics operate properly, bolt the grip base on (being careful not to pinch any wiring), and you are 100% done.

Welcome to the brotherhood! Give your brand new blaster a good shakedown shoot before hitting the field. This is also a good time to familiarize yourself with the T19's handling.
(Battery installation note with the 4 cell Graphene: Insert it into the stock wiring end first and horizontal with the wiring exiting toward the top. It should sit at about a 45* angle with the rear end clear of the stock buttplate and should not push the switch wiring out of place, and should not need any foam to not rattle.)


Righty allmighty, keep things square, and go teach some fools what a T19 is!
Next: Part 12 - Tuning and Customization (coming later)
No comments:
Post a Comment