Sunday, April 29, 2018

Project T19 Part 10 Developmental Release LInk and Rundown. Plus Inconclusive Buscaps and Startup Gremlins

First things first: Google Drive link to the T19.101 developmental release part meshes and some assorted firmwares.

WARNING: Developmental release means developmental release. This is for the curious, those who walk on the very edge and want to be the first kid on the block to have one of these at all costs, and for the benefit of those who want to adapt or hack parts of my designs, mainly. Sort of like SimonK says but intenser: If it explodes, you get to keep all the shrapnel. No promises and no support here - yet. That is coming soon. I promise.

Actually, the models all came out relatively final on the first print, and assembled into that first build without many trims and adjustments. But these are the known bugs:

  • Breech - Lower screw bosses for the side covers come too close to the cover's lower edge and will need to be trimmed about a mm back parallel to the cover edge to clear.
  • Grip base - Needs a grind on the top front edge to clear the mag release spring perch reinforcement in the drive housing.
  • Cage (Hy-Con-GammaMajor_Main) - Insufficient clearance in the phase wire channels for the heatshrink on the phase wires coming out of the stator. Needs ends of the channels widened adjacent to motor mounting surface.
  • Stock - may need some supports and/or spaghetti cleanup after printing a surface over air.
Some roughnesses and improvement areas:
  • Trigger and mag release axial clearances are tight - hand fitting parts is required!
  • Magwell fit - I erred on the side of loose for drop-free and compatibility with a maximum tolerance range of mags, but this feels somewhat sloppy, so I will be adding 1 or more magwell models with tighter fit in both directions.
  • Cage groove filler clearances on Gamma Major are tight with the 9.5 wheel, and the lead-side fillers serve no concrete purpose (they are absent on all previous groove-filler Hy-Con cages which work flawlessly) so could be removed anyway. If you mess up your flywheel manufacturing and fitting and have too much runout, you will hit the cage.
  • Bolt clearances in the drive spacer rails are a tad loose and AK-like - this doesn't affect anything functionally though.
  • I need to get those 10mm and even larger gap flywheels up as an option.
  • Stock and stock base tube sockets need a bit too much grinding/sanding for 1" PVC fitment. Ideally, just removing layer change blips should do the job.
  • Grip frame install into the channel in the grip base is tight and needs hand fitting.
A word on PLA: I have no experience with and can't support PLA for T19 parts. Do that at your own risk. I use PETG only. Most parts should by all means work fine with PLA, but I haven't and may never test with it.

Words on my slice/print parameters:

All numbers consider my 0.4mm nozzle and 0.2mm layer height.

Most unspecified parts I use 6 top and bottom layers, 3 perimeters, and 30% hexagonal infill.

Flywheels: 4 bottoms and 3 tops, 3 perimeters, 20% hex - this is a possibly PETG-specific inertia minimization which is plenty strong and stiff.

Cage main section: 3 perimeters, 100% infill. Hy-Con cages are very sensitive to stiffness in the motor mount section. Also, 100% cages are distinctly quieter even if you were to find that solid isn't quite necessary for stiffness.

Grip frame and grip base: 10 tops and bottoms, 5 perimeters, 40% hex. Don't skimp on these, they are how a rather heavy blaster is handled.

Crank web: You may want some more perimeters on that as well for shaft bore, setscrew thread, and crank pin thread robustness if using something non-PETG.

Preliminary words on assembly:

3mm motor mount holes for wheels and pusher, 2mm flywheel bolt holes, all 3.6mm 6-32 fastener clearance holes and 3/16" 10-24 fastener clearance holes need drilling to final size to clean out.

2.7mm 6-32 tapped holes need drilling before tapping to avoid difficulty - I use ~3mm with PETG.

3.8mm 10-24 tapped holes should be tappable as printed. Be CAREFUL tapping the front rail hole in the cage! Don't dent the ID of the barrel with the tip of the tap. It comes CLOSE in there.

3mm shaft pilot bore in the flywheel center is a relic and now an overconstraint. Drill that out slightly oversize. The rotor OD locates the Gen3+ wheels, not that shaft pilot.

Watch out for screw lengths surrounding motors, both the stator base to cage and the flywheel to rotor flange bolts have the potential to hit and damage the windings if too long!

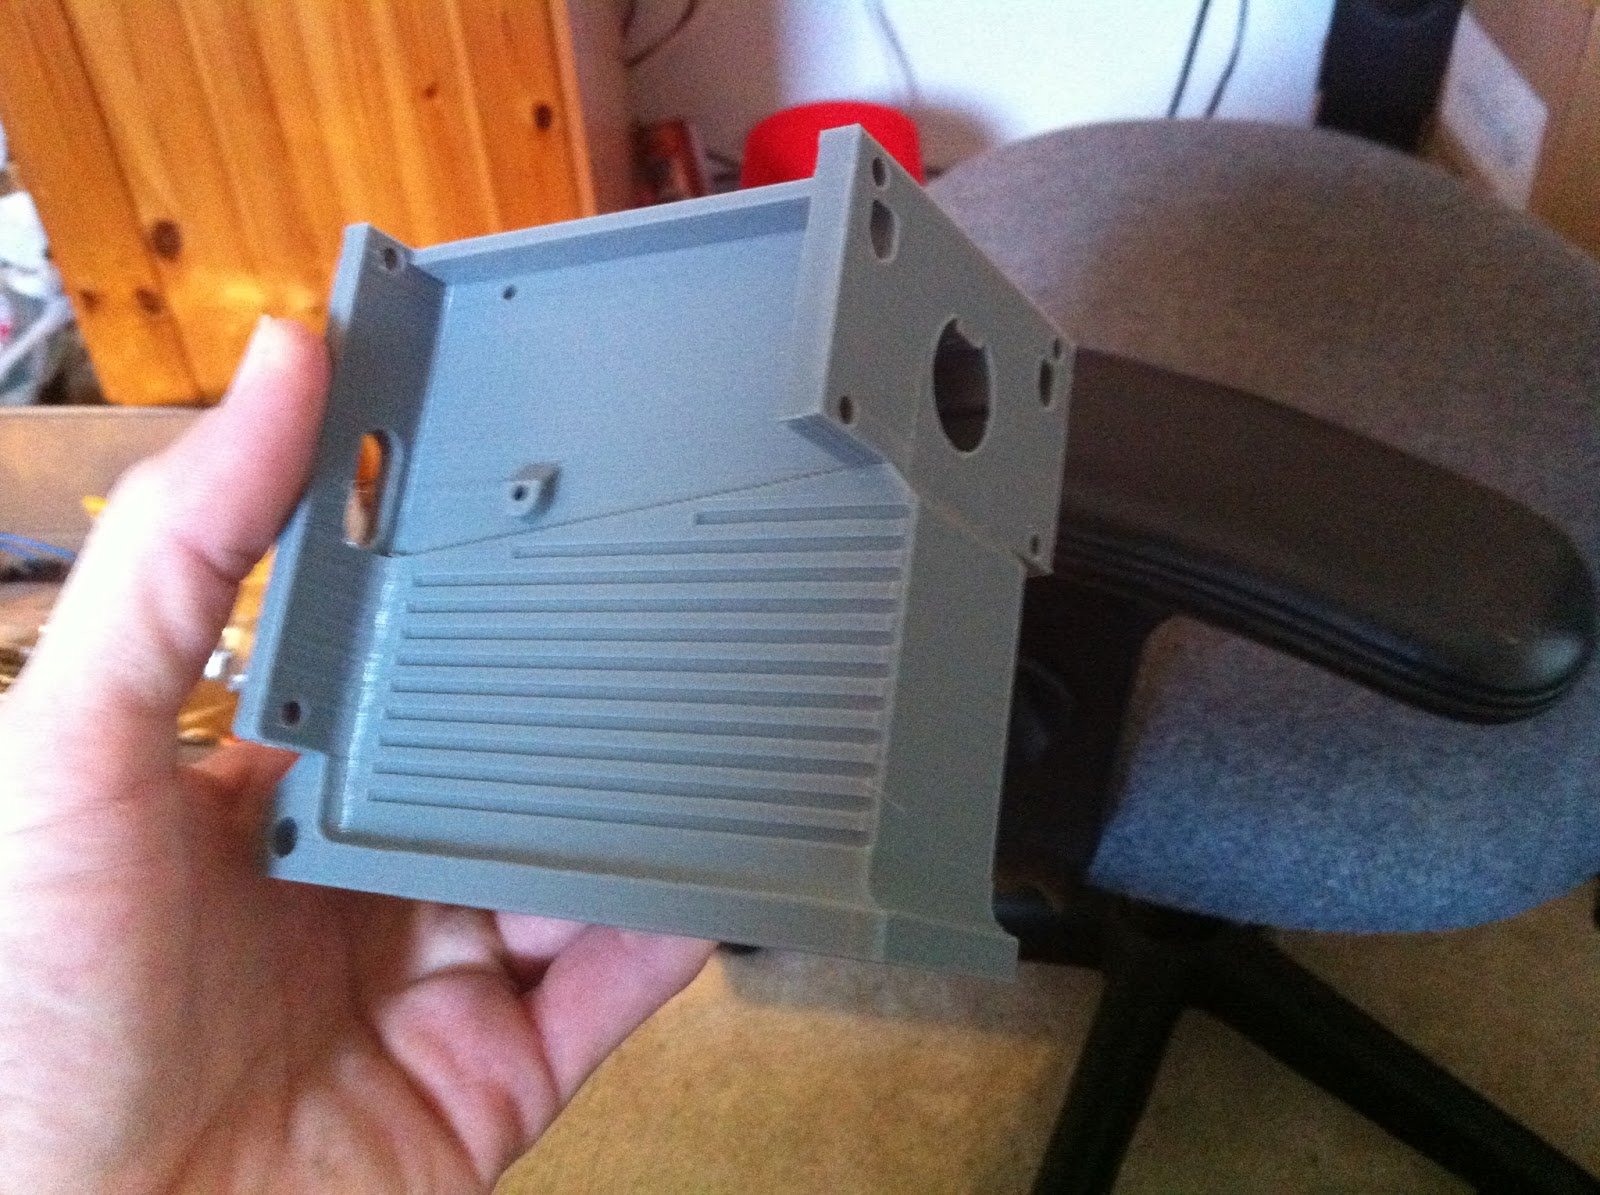
Alright, time to stick an image in here to break the textwall and shift gears while the clutch isn't biting for a sec:


I remain unsure of this upgrade.

By all textbook and EE means, upgrading the DC link cap on an inverter should ONLY be able to benefit proper inverter operation and should be a safeguard against voltage transients. You CAN'T have "too much" of it. The DC bus is supposed to act as a stiff voltage source in the design theory of a VSI. Adding a larger capacitance with a lower ESR to it near the switching devices only assists in making that closer to true.

However, zero-cross detection sensorless is a finicky beast, and lacking feedback current control, parasitic bus impedances ARE a variable that affects phase current and could affect the performance of sensorless. With this build, I have encountered less consistent motor startups than with my other Hy-Con gear, and dare I say, the controllers with the 1000uF Kemets were worst at occasionally "misfiring" (with some red desync warning LED flashes while SimonK powerskipped and attempted to reestablish what the rotor position was) on start. This would occasionally cause a slightly delayed spinup and a derp shot. Controllers with the 220uF Haicaps that I have tested so far are also not 100%, but are slightly better (I have tuned the SimonK build and feed delays both to a state I am happy with using for now and has prevented all derp darts).

Component tolerances (sense resistors, ...) can't be ruled out as why certain individual ESCs might be more apt to have sensorless glitchyness at low speed. But at the same time, one aspect that stands out is that Serial One's 14AWG harness, very high rated switch, and present 1.5Ah Graphene all result in lower DC bus impedance (both resistance and inductance) than the Model Pandora's long 16AWG battery wiring, 16AWG squids, cheap switch, and Monolith pack. Perhaps it's that provoking the trouble. It's not unprecedented for this to be a variable to worry about. With Ultracage, some posts give cases where simply switching to a high end battery can make a BLHeli drive that previously worked completely freak out in a FAR more epic way than my perfectionist griping is about.


So there are 2 directions to go from here, if that proves to be the cause and not just a dud Afro board or two.
  • The correct engineering one: tune SimonK to work on this hardware with a very stiff DC bus. Changing various startup mode and ZC detection parameters, using high side PWM, or adjusting duty schedules (I did have some success with cutting the startup duty back a tad) might do the trick on top of the timing that I have been dialing in. Then, we can run uprated caps and have less voltage spikyness on the bus (safer for the mosfets), and be more tolerant of a wide range of batteries.
  • The "stop fucking with it; you had the damn thing working like clockwork before" one - avoid the overkill caps, and avoid the overkill batteries.
I'm gonna keep chipping at 1, but I am also going to consider the validity of 2 by trying a single-P Monolith on the same drive parts and software as a comparison. I'm perfectly happy with the performance of the single-P on the Model Pandora, and it is safe. It may well be that practically it is better and gives more consistent startups to have a slightly non-ideal bus voltage stiffness and perhaps even slightly duller best-case accelerations if that's what makes the sensorless voodoo happiest. Because what it boils down to is what feed delays you can consistently get away with, and right now, the Graphene-equipped Serial One is doing slightly worse at that, not slightly better as I expected.

Saturday, April 14, 2018

After-action report USF HvZ S18 and TBNC 5 - 2018-Feb

USF HvZ Spring18:

I was able to attend the last ~2.1 missions worth on Saturday (probably most of the combat in the entire 2.5 day game) - unfortunately not all of it, due to a combination of motherfucking work schedule and motherfucking slow I-4 traffic.

Mission 2 on Saturday was, to be honest, terribly designed. Humans were to move an objective (a giant teddy bear filled with 165 pounds of sand, and I am 100% serious) through 2 pagodas in USF's MLK Plaza and defend it for 10 minutes at each. The large Plaza was an Infested Zone, in which humans were completely disarmed and could NOT defend themselves, only evade zombies. The pagodas were sock-only zones. There were several circles of traffic cones in the plaza which were moved by mods at regular intervals and were armed zones, but only permitted 3 humans to be present. Zombies had spawn points at the edges of the plaza. Clearly, this sort of lazy, heavyhanded and agency-reducing game design, which amounts to not permitting humans to fight at all over a large area and requiring the vast majority of them defending to use a single type of weapon that was in short supply while zombies respawned and respawned and respawned and hammered them, resulted in a shitshow. There is a tremendous amount of discontent in the community about this mission and mods have deleted some threads on the facebrick groups, which is not a good sign at all in itself.

During this I held with the sideline group firing into the plaza from its borders, supporting the interior humans as well as we could. There was a bit of questionable human tactics here. Had I not been there to convince otherwise, everyone may have attempted to run in and join the sock unit or the cone zones, and we may not have had a persistent sideline group. Since the entire plaza disarms humans, the retreat at the end could have been a significant FUBAR without a sideline squad to stun zombies near the exiting human group. I'm not sure if players really comprehended that at any point. Also, one of the most viable tactics was to spawn camp the zombies and stun lock them, since the spawns were in an armed zone. Overall shitty design and poor excuse for a difficult slaughterhouse mission. There is a place for a difficult, casualty-inducing mission in games, but it ought to allow both humans and zombies to actually play the game as intended. That was just a bullshit mission in every way.

To USF mod squad's credit, the final mission was much better and involved defending multiple locations while data was retrieved, then returning the data to our NPC. This was a good hard fight but it was a well designed mission.

So onto the gear observations.

The Model Pandora T19, running 4S closed loop and 11rps ROF, was absolutely rock solid. Zero complaints with it at all. This was my first time running single-trigger control in HvZ, and it was a straight-up improvement under combat conditions, I don't miss manual motor control one bit. Closed breech and stepper direct drive feed reliability is absolute, with perhaps one time where I skipped some steps momentarily and then self-recovered. Velocity and range improvements with this system were also very nice; USF is a very open campus compared to the locations I played long ago, and the game tends toward ranged standoffs under which Hy-Con flywheel systems were excelling at dealing out hits. Hitting harder does also help enforce honesty, more people called their hits when I shot them this time than I have seen in past games running stockoid guns at lower velocity. I have not had any complaints from zombies about pain yet despite the high velocity and occasional engagement up close. Ammo use when engaging at range and overall is significantly reduced as well with the accuracy improvements; I was finding myself doing about half a mag per charge.

Waffle tip and generic Accustrike were the darts that proved themselves. I still prefer waffle outdoors at long range, since Accustrike is a bit more droppy. However, Accustrike is consistently grouping very well and its range is nothing to sneeze at either. In TBNC 5 the following day at USF BSN building, I had received my accustrikes from the TBNC group dart order of about 23,000 rounds and was running mostly those, which were able to nail lots of difficult shots on mostly-hidden players.

I brought one mag of Mengun darts to a mission for evaluation, since I have a large old stock of them that I have been saving. Unfortunately, these didn't hit shit at the 180+ fps the Hy-Con can put them up to; they behaved like streamlines and attempting to engage at ranges where waffle could basically point-and-click a zombie's headband down was just downright hopeless and hilarious; a sideways tornado of entropy going everywhere but the zombie who is now laughing at me. That is unfortunate, as Mengun has had a very low tip loss rate, good velocity retention, excellent flywheelability, and great foam and is also barrel-compatible to some extent. This isn't unexpected though that as velocity keeps climbing that ammo changes are going to be necessary and older darts are going to become inadequate just like koosh did around the 150fps high-crush SSS era.

One of my early adopters of Hy-Con, UF HvZ's Matthew Bregg, attended the game. Check out his blaster build Yellow Submarine sometime; it's a Swarmfire shell containing a Rapidstrike gearbox, a Hy-Con cage package with 20A Afros and an arduino doing some cool pusher motor/gearbox protection and select-fire stuff.


He was running a Protocage a while back and recently upgraded to a Beta Prime and Gen3 wheels, solving those waffle jams that the old non-groove-filler cages had. This was great to see the Hy-Con used by another player and to have 2 of them on the same field. Pretty cool to hear V-Specs firing up on SimonK and the snapping of darts going through coming from elsewhere in the formation.

He also gave me some newer red tip/black foam brick tip darts to try. I meant to get detailed observations but instead I wound up railing on zombies with them. So... Thank you for the stuns. They did well, comparable to waffle or maybe better, so I purchased a case and have been running sample mags time to time. Next TBNC field game will be the true test, but I am considering both them and waffle as my go-to range/outdoor dart going forward. Glue is also much better than the brick tips I had long ago, and better than waffle and accustrike clones these days too. Of note is that the brick tip design is unexpectedly flywheelable despite its apparent structural rigidity in the radial direction - when playing with a cage I was building rolling some darts through by hand it was clear that the horizontal layers actually get folded forward and inward while entering wheel contact, and that most likely happens in real time as well. The bricks have been shooting smoother and quieter than waffle on my Hy-Cons.

Unfortunate casualty of the weekend was one of my Worker 22 rounders, which seems to have been stomped on HARD in the chaos of the final mission's last objective.

I'm not sure if that can be repaired, it's smashed the fuck up and might be totaled. Probably just some bad luck, I have actually threw fewer mags to the ground lately than I used to notoriously do. Oh well, it's just a mag. Speaking of Worker 22 rounders, I am very satisfied with these. Absolutely recommended, 22 is a great number and I have had excellent reliability out of them. However, if you are a shorter individual or a chest rig user they are going to be awkwardly long. I'm tall and built just about like a slightly scaled-down Na'vi and I also use only belt rigs for mobility and cooling reasons.

I also did another UGA'14 style "rifle always" run this time around. I brought my WASP and holster to the game, but I never put it on, it was in my backpack the whole time. I never felt like I needed anything beyond the T19 and a few socks in case a Hunter went after me. The following TBNC game I only brought the T19 and my holdout Jolt. The T19 has so far been exactly what I wanted it to be, which was a blaster that can be absolutely trusted.

Friday, April 13, 2018

Project T19 Part 8: Quick Update (images)

T19.101 aka: "Production T19", codename Model Mo'ara


One-piece breech housing. New mounting patterns distinct from the symmetrical, narrow spacing Model Pandora breech bolt pattern. Vertically taller drive section pattern. Provisions for new flywheel motor controller location under side covers (which is only a cable space on the Model Pandora). Widely fenced magwell for forgiving loading. New mag release pivot design using a SHCS instead of a press fit pin. Unified aesthetics and smoothed handling areas.


DC link capacitor upgrade for 20A Afro motor drives: stock 220uF 35V Haicap, uprated 1000uF 35V Kemet ESY. Wimpy wimpy wimpy... HEFTY HEFTY HEFTY.


Controller with DC cap uprate installed with Gamma Major cage mated.


With side covers fitted.


Flash hider is carried over from Model Pandora (3-bolt muzzle device pattern is part of Gamma Major cage models by default)


Gamma Major changes include smoother externals, even stiffer design with reduced stress concentrations versus narrow-center Beta family, counterbored fasteners (excl. motor mounting bolts for a specific durability reason), tappable hole patterns for flashlight mounts, double-sided groove fillers, radiused user contact edges, and flywheel bolt inspection/torque check holes. Basic Hy-Con dimensions are adhered to, though <9.5mm wheel profiles will require a revision with slimmer groove fillers to clear.


T19 buttstock system uses 1" Schedule 40 PVC. Stock base with integral Masada-style sling mount using a SHCS. For lefty user, reflect model about axis before manufacturing, or install upside down if you don't mind where the screw head is.


Stock body is a battery box and contains a seat for the Bulgin 1300 series high inrush rated main power switch. An alternate version contains a DE-9 connector mounting pattern for internal charging of a hybrid cylindrical battery.

This is a 19-odd hour print. I started this chooching, went to work, came back with it still less than halfway through, had a very sleepless night while the Prusa chugged away, and had her done and lifted off the bed by 1600 today. Whew, thank you Eywa, for watching my silly machine and making sure this one didn't crash.


Collection of parts, including Production's totally redesigned drive housing and drive cover to be shown in detail later. A drive spacer is running right now.


The stock body showing switch cutout. Some pretty hardcore bridges in this part but did quite nicely.

Bug: There is a bit near the end where the stop for the stock tube is that is a SUPER hardcore bridge outright printing a big flat surface and a circular hole perimeter over nothing but AIR when you use the intended orientation for FDM-ing this part. I didn't have a problem getting it to pull through with the fan blasting, but some spaghetti is inevitable. Changes will be made to that model before release so that if your machine lacks part cooling, etc., you don't have too large a mess in that area.


I swear I did not measure the Model Pandora stock when designing this, but it's within 5mm/couple degrees in every dimension.