Thursday, May 14, 2015

Shelf Watch 05-14-15: K'nex K-Force at Millenia TRU

Finally found em!


Mega Boom

K-10X
Dual Cross
30 darts and target
Of course, I bought darts. Those will be reviewed when I have access to my chrono and Tacmod. Initial results are promising, but not groundbreaking, and I may be having the same quality problems (including excess glue) as some other nerfers who have tried these already.
Also saw this Zing bow knockoff. Sorry for all the blurry and badly composed images, I was trying not to look sketchy photographing the shelves.

Wednesday, May 13, 2015

High Velocity BoomCo First Test Shots: Fail

So I got back to Site B and commenced the initial tests of the slick-coated BoomCo darts.

First of all, the barrel stock:


K&S 9319 - 1/2 OD x 0.035 wall aluminum tubing, .430 bore.

Perfect for use with the BoomCo dart and a pneumatic engine. Slightly smaller bore than the .436 provided by 15/32x0.014 (thin wall brass and aluminum). You can just see the slightest daylight around the widest part of the dart which is where the body is roll-crimped onto the tip.

This stuff is also a lot nicer to work with than the thin wall tubing. It is a lot like the .527x5/8" stuff used for .50 cal, just smaller.

I picked up a 3 foot stick of it, which I did not modify - because I now plan to return it.


This is the test gun, a PVC "mini spudgun" with a 150cm^3 chamber and a 1/2" port piston valve. The valve performance is excellent, similar to a QEV. This thing is more than equal to any sane use of a 4B tank even at sub-50psi pressures.


I didn't bother with the pressure gauge yet. Or the chrono, because I was an idiot and left it at Site A. However, I varied the pressure and velocity quite a bit during the test. I never went beyond about 40psi (12 strokes of the hand pump that I used).

Here is a sample of what I shot.


The shortened darts had the rolled-in end restored with a lighter.

Thursday, May 7, 2015

R&D: BoomCo Dart Tip Antifriction Coating

Back a while, I had started messing with the .40 caliber plastic body projectile from Mattel's new BoomCo line. I was discouraged, feeling loyal to .50 cal foam, and ready to write them off, but yesterday's redditing led me to a revisit, and I may have got somewhere.

So, as we all know, the rubber tips of the BoomCo dart are known as an obstacle to long barrels.

My first attempt today at addressing that issue: Wrap tip with 33 tape.


Problems: Consistent bore size of the finished dart is difficult to maintain. The tape tends to slip under tension, become unstuck from the smaller diameter features as it un-stretches, and leave sticky residue over time that collects junk. Finally, the tape stiffens the rubber tip and may hurt on impact with the edge, and this may be considered a stefan or a DIY dart.

Attempt 2: Use an old HvZ trick I came up with, cyanoacrylate (superglue) as a low-friction surface coating for rubber.

I wasn't sure what would happen here. Would it bond to the mysterious and proprietary "Smart Stick" compound?


Tuesday, April 21, 2015

Tacmod 3.1 Progress

Here is what has happened:

Cut up and flattened a whole lot of PVC


Built up the receiver for the flat top. You will see why I laminated 2 sheets shortly.


Seen from inside.


Mocked up rail install.


Flywheel clearance. In the stock RS, the cage is strategically positioned right under the front support for the carry handle. This allows the cage to stick up into the support, without messing up the clean lines of the top of the receiver. Of course, I want to lose the carry handle here, so that is a problem.

I could have left part of the carry handle support intact, but I decided this route with exposing the cage and cutting out clearance in the buildup would be cleanest. I hate those telltale bulges ruining the lines of flat top jobs on these things.


Marking ejection port on the left panel.


Port area cut out on the left panel.

You will see how the rest of everything comes together. I need to be able to topload, since I do scavenge on occasion. Thus the decision to put the port on the left.


Right panel underside with a nice smooth chamfer cut into it to match. You can also see hardware clearance holes for the rail install.


Rail installed with all fasteners. The rail is bolted with 10-24 button allen screws, washers and nylock nuts to a single non-clamshell PVC plate. This is then screwed to the receiver (into the PVC laminates) with 8 6-32 allen flatheads, countersunk. All black hardware.


The underbarrel rail follows a similar pattern. Single layer PVC buildup on the shroud, then a PVC plate with the Magpul rail segment bolted on with its stock hardware.

Mocked up with flashlight mounted:


This thing is SOLID. It already feels great and it isn't even structurally finished. It is also heavy. Heavy is good, nerf guns are too light. I am going to continue on the theme of reinforcing and filling things, especially the stock.

I gave my 552 a try on it. Awesome, as expected.

Not shown, the modified jam door. I fabbed in a charging handle on the side which will allow operating it easily without access to the top, with bonus tacticoolness. I am working on extending the stroke of it as well to make toploading easier.

To do:
Fence magwell
Magwell front
Cage underside bodywork
Fill and finish top rail install
Motor endbell covers
Install arming plug connector
Gut a stock for battery, reinforce and devcon together
Carefully straighten rail installs, adjust the mounting holes and glue the nuts down
Make flash hider
Order switches for FCG
Obtain a Stryfe cage and fly set
Mod cage for Tacmod use
Look into Demolisher Flywheels
Build battery pack
Build FCG
Mod pusher box for 180 motor
Figure out the sling situation (Later?)
Paint
Install charging connector
Wire
Shorten a Stampede inner barrel to fit
Add magnetic jam door latch
Tag people.

This project has taken on a bit of a SCAR vibe:

It is about time I realized where that cheek rest on the RS comes from. And it is strange that the Tacmod project has gone this direction. I wasn't trying. I was just going for a better superstock rig.

Even before I saw this I was considering adding side rails in their rightful place (up front near the muzzle) too. I think that will definitely happen in the future.

Thursday, April 16, 2015

Tacmod 3.1 Concept and WIP Primary Build

The evolution of the Tacmod lineage:


The concept 3.1 eliminates the carry handle in favor of a full length top rail. This gives a bit more modularity and is a bit more friendly to optics. Additionally, all nonstandard Hasbro rail segments are to be replaced with Picatinny (MIL-STD-1913).

Next car in the Picatinny train will be to develop Picatinny conversions for the carry handle equipped 2.1. The 2.1 is the gun you guys know, the one you have probably been hit by if you play TBNC or Florida Polytechnic HvZ:


Or at least, that is the prototype, which is a work in progress itself. Recently, I finally got around to repairing my charge connector hack once and for all, and with all balance wiring properly separated from the charge current path and a new charge cable made up to match, it charges and balances like a boss.


Wednesday, April 1, 2015

Shelf Watch 04-01-15 Lakeland, FL Big Lots

Something new I am trying out for Shelf Watch, not that this one is breaking news or anything, but I figure that 99% of the time if I or a local wanted something from there I would have bought it before posting anyway. So may as well post a map of where the sightings were:

I went into this Big Lots expecting to maybe find some cheap clearance stuff. Instead, I found 2015 products. Doubledown

Snapfire

It is strange to see such a recent release at this store, but it does appear the Sharpfire, Snapfire and Doubledown (all part of this new shell-less minimalistic design language, all springers based in some way on the Jolt design, and all non-Elite) are aimed at this sort of market. Big Lots, Family Dollar, endcaps at random stores and the like.

The Doubledown actually appears to have a good bit of displacement and feels like it could take a monster spring, and I love the grip frame for aesthetics. The Snapfire on the other hand... Meh. An actual Jolt is just a better way to go than this thing, which is larger and has that cheapo skeletonized grip that just can't possibly feel good. It's like a 99 cent scrub brush handle.

In addition to these, I found some older generation Nerf Super Soakers:


Sadly, no Lightningstorms with the bundled stock. If this had been one of those, I would have snagged it for that price.

And the original generation iPhone rail mount for $6


Meh.

Nitron Flywheel Motor Postmortem and Observations

So, well over a year ago, I built one local a Nitron. It served well, fired many thousands of rounds without a hint of trouble, and gained a legendary and feared reputation as undodgable full auto Vortex ought to.

Then someone just had to decide that its original 12V NiCd pack was not enough and try a 5S lipo. Okay, I could understand a 3S lipo, that would be almost the same voltage with less IR, less weight and better performance over the life of the charge. I could understand a 4S lipo, even. But, a 5S lipo. Come on, seriously, you guys can tech guns and you know why it was a bad idea.

But end of story, the factory 280 flywheel motor ended up roasted and the RS carbon pusher motor probably on the way out. Now, the pusher motor, who cares, you can just slam any 130 or 180 on there and go, but the flywheel motor...

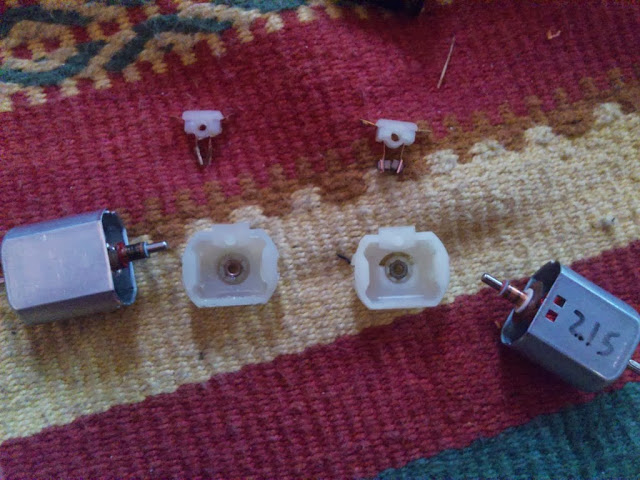
Just to confirm, it is a generic Mabuchi-type 280. Here it is next to a Sagami "Cyclone" 280


This is going to be the hardest piece of the puzzle. The shaft stickout on the PTO end is 15mm. Most 280 have shorter shafts, 10.4mm and 12mm. Perhaps the 12mm could be made to work? I have not found a single motor with this 2.0x15mm spec for sale yet (except flat can FC-280 which are usually wound too cold to use here as well), it was probably a custom order by Hasbro specifically for this gun. Hell, I'm guessing it was a custom wind as well, see below.

Crispy fride brush gear. These are not EOL and this endbell still has something left but those carbons are about halfway gone. The comm was nuked and jet black with scale/oxide, as well. I suspect why this motor died was the comm.

Armature. I unwound 2 poles which was difficult because the insulation had started melting and the wire was beginning to short and weld together. I counted 112 turns.

This is a good thing, because 280 motors hotter than 112 turns are, almost all of them on the market. The most common wind of stock 280 is -2485 (85t). That should work great for Nitron fly motors assuming the shaft issue can be dealt with.

Custom shafts may come into play here. The comm and armature stack can be pressed off the shaft and a new one fitted. This would be a tedious procedure but perhaps necessary.

I found this interesting. This is the 280 arm next to one out of a FK180. As you can see, there is not a terrible difference here in how much core steel is on these. The 180 arm has a slightly longer stack.

The 280 stack is a bit larger diameter.

The comms are damn near identical. You would think the 280 would be larger, but no. This is probably why the 280 fly motor died as it did, because with 18.5V there would have been arcing going on with that little comm. This is not a 300 series.

Thursday, March 26, 2015

Shocked


We have all heard of the Nerf Mega Bigshock by now, and spring upgrades and .50 cal conversions have already been thrown around. I figured I would snag one to mess with.

[insert stock photo of a factory Bigshock here]

Out of the box, it was obviously underwhelming. I took 4 chrono shots which hovered around 58 fps.

This is the piston group disassembled:


The rod is some kind of soft plastic, probably PP, like a Triad rod also seems to be. The end plate has speed holes from the factory.

The piston head has a thick molded rubber pad from the factory (Please do not argue about whether to remove the AR!) and is attached with one of these press fit pins instead of a screw. Hasbro seems to skimp on this lately and I am not sure why, a hard enough yank and you will rip that fastener right out. With spring upgrades, getting rid of it is mandatory.

I ran an 8-32 tap into the rod and installed a screw with plenty of thread engagement.

It is interesting to note that the piston on these is not keyed to the rod. It can be rotated freely. This may be useful if the step on the piston where the sear engages gets worn, to extend the life of parts.

Watch out with the rubber bumper. It should stay on fairly well, but if you don't have a large washer or screw head, it could get dislodged. You may want to CA it to the piston.

The rear barrel plug is solvent welded to the frame and is designed as a cosmetic part with the stock shell. I, however, have discarded the shell, so this will not be retained, a simple plug will be fabricated. AR is a standard D'Andrade valve, just bigger, and has a rubber insert.

There is a step in the barrel, not just the peg supports, which prevents inserting dart foam past the end of the tight section of the bore. I ground this away carefully, since I want to load darts flush like I do with my .50 caliber Jolts.

Spring is nearly identical in dimensions to a Buzzbee Tek spring.

I tried out this Tek spring plus a stock Swarmfire spring and bagged 78 fps. I then settled on a shortened Everbilt which produced about 91 fps and is very nice and snappy. Proper data on the final build will follow when I have enough ammo to do a shoot.

This hole was found in the piston head. Be careful, it goes through to the backside and is how the usual AR vent port is implemented. Fill it with Devcon or the like.


Speaking of vents, this is a type of ported cylinder. The two bulges on the outside of the grip are where two slots, like transfer ports of a two-stroke engine, are, which prevent any compression until the last approx. 1.25" of stroke. Yes, some may complain about "those dreaded holes in the PT" and "nerfed performance potential", but for the stock barrel, there is probably nothing wrong with this and little to gain, in fact there may be something to lose by changing this feature.

However, if you will put a longer barrel on one of these, it can be trouble. Cartaya has already discussed de-porting the Bigshock the hard way.

The stock O-ring seals perfectly. If the barrel is plugged before firing, this one will hold pressure for well over 15 seconds without leaking at all, and has minimum friction. Don't tamper.

And here is the result. I cut off a bunch of webs, ribs, tabs and other now-unnecessary shell provisions on the outside of the frame and end plate and reshaped the front of the trigger guard, which do help quite a bit with comfort. The top tab on the muzzle was kept as a front sight post. The plug in the back of the frame is a piece of sheet bonded to 3/8" of 1/2" PVC which was filled with epoxy putty for dead volume removal.

Shoots real nice. It has some serious snap to it, feels exactly like a scaled-up version of my .50 cal Jolt should, and oddly enough these darts seem to get more accurate the faster I shoot them.

Obviously, with a .50 caliber insert you could get some serious velocity on a micro. I am not doing that, since a major part of the appeal of these things is the 20mm hand cannon factor and the utility of shooting darts often assigned anti-armor and enhanced damage effects. Also, about those rear frame plugs, there is no reason to make them fixed. I made mine fixed because again, I am just going to muzzleload a mega. I have seen concepts for RSCB feed tubes placed there. A convenient fitting for modularity is a 1/2x3/4 CPVC CTS bushing. Hint hint.

Friday, March 20, 2015

The Next 2s Solution?

When looking for some e-sky and blade motor listings, I came across these:

http://www.ebay.ca/itm/6-pcs-180-SH-High-Speed-Magnetic-Motor-Fan-Horsepower-Torque-Micro-DC-Motor-/121366544377

Their specs are quite superior in terms of 2s lipos, drawing 0.75A continuos each while blades would draw ~0.6. The RPM on these would be hitting the 40k mark while blades would hit ~28k. For 3s, I still think blades would be better but these seem to be better on 2s. In terms of price, these are about $3 a piece which seems to be a bit cheaper!

Since these are 180's, their inertia and torque should be substantially higher than that of 130's. These are in fact, carbon brush so there is no need for getting all worried about stuff like: "Am I going to burn out these motors?". For those of you who aren't familier with what carbon brushes are, here's a photo:


Photo credit goes to SSGT on britnerf.

So basically, the things on the left are parts of a standard metal brush motor. the brushes which are the things at the top are very thin. The problem with that is that you will be sparking these brushes all the time whenever you put power into the motor. That brush will get worn down as heck! Now look at the things on the right. Those are the parts of a carbon brush motor. Look at its brush set at the top. It has two chunks of weird things right? Well those weird things are what makes carbon brushes carbon brushes. They are chunks of carbon that help with brush wear.

Thursday, March 19, 2015

The case for calling them magazines

 
I do not mean to nitpick, but improvement could be seen,
If we could bring ourselves to say exactly what we mean.
- Jeff Cooper
 
 
Is this a clip or a magazine?

Magazine describes the form and function of this device, and clip is the name that the manufacturer has chosen to give it. Either term could be used and would usually be understood - but which term should be used?

This is a debate which pops up every once in a while on r/Nerf, and this is a contentious and surprisingly divisive issue. Every time this debate has occurred, my opinion has shifted a little. Specifically, it's shifted from
"Who cares?" to "Magazine. It's a magazine, dangit!".

Here's why.